Part 5: Creating the About page
The about page will represent the majority of your content on your website. Most of it will be broken up into two columns with the main content on the left and supporting content on the right.
Step 1: Paste the foundation code
1. Open index.htm and copy everything in that file.
2. Open about.htm and paste it there.
Step 2: Change the page title
Change the page title to About between the title tags in the header.
<title>About</title>
Step 3: Create the left column
3. Paste the following code into about.htm inside the #content div.
<div id = "left-column">
    <h1>About</h1>
    <div class = "content">
    <h2>What we do</h2>
    <p>Phasellus sollicitudin adipiscing luctus. Vestibulum suscipit, velit ac pharetra malesuada, risus enim lacinia nunc, vel rhoncus metus libero quis erat. Etiam porta est id tellus ultricies quis accumsan ligula interdum. Cras quis velit nulla, non pellentesque metus. </p>
    <ul>
        <li>Mauris neque nulla, rutrum eu rutrum.</li>
        <li>Duis magna erat, luctus et accumsan</li>
        <li>Phasellus sollicitudin adipiscing luctus.</li>
        <li>Mauris ut ultricies ligula. </li>
        <li>Cras molestie pretium orci nec laoreet. </li>
    </ul>

    <h2>Why choose us?</h2>

    <p>Mauris neque nulla, rutrum eu rutrum ac, mattis in nibh. Suspendisse ornare vehicula justo, faucibus mollis tortor iaculis vitae. Duis magna erat, luctus et accumsan non, fringilla sed libero. Mauris luctus tincidunt libero, ut consequat eros accumsan a. Nunc volutpat hendrerit lectus, et eleifend dui eleifend nec. Nulla porta condimentum sem.</p>
    <dl>
        <dt>In eget mauris neque</dt>
        <dd>Morbi vitae egestas purus. Donec pharetra volutpat dapibus. Sed urna risus, convallis vel tincidunt vel, pharetra at nulla.</dd>
        <dt>In eget mauris neque</dt>
        <dd>Morbi vitae egestas purus. Donec pharetra volutpat dapibus. Sed urna risus, convallis vel tincidunt vel, pharetra at nulla.</dd>

     </dl>
     </div>
</div>
4. Inside layout.css paste the following after the #content block.
#left-column
{
	width:640px;
	float:left;
}
The Content Class Div
5. Inside layout.css paste the following code
.content
{
	float:left;
	padding:10px;
}
The content class (class = “content”) should not be confused with the content id (id = “content”).
The content class adds a padding to each column and makes sure that the content flows correctly. The content id adds a background image and sets the default height of the content.
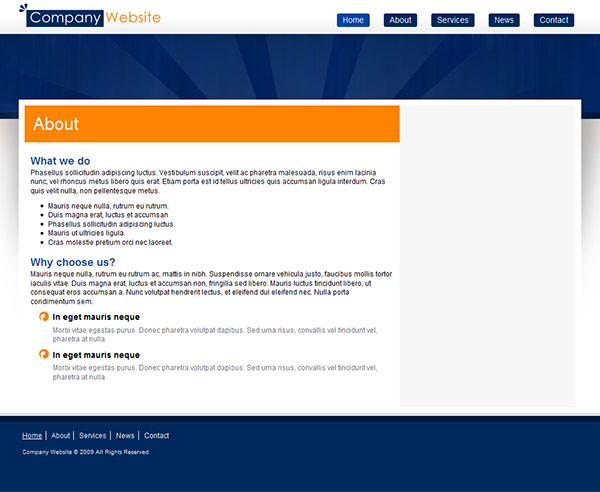
6. If done correctly it should look like this
Step 4: Create the right column
1. Paste the following code right below the #left-column div
<div id = "right-column">
    <div class = "content">
        <h2>Our Mission</h2>
        <p><em>Mauris eu sapien risus. Nunc vel mi dui. Nunc velit felis, iaculis ac iaculis vitae, volutpat vitae est. Donec vitae felis ac nunc interdum malesuada non ac tellus. Aliquam eros dolor, bibendum ac. </em></p>

        <h2>Contact Us</h2>
        <span>Toll Free Number:</span>
        <h3>1-800-555-INFO</h3>
        <br />
        <span>Email Us</span>
        <h3>info@companywebsite.com</h3>
        <br />
        <h2>Recent Events</h2>
        <div class = "event">
                <span>August 9th, 2009</span>
                <a href = "">Vivamus sed lectus est, sagittis iaculis. condimentum hendrerit feugiat </a>
                <p>Sed quis ipsum est. Cras dapibus nisi eu arcu adipiscing eget faucibus mauris tempus.</p>
         </div>
        <div class = "event">
            <span>August 9th, 2009</span>
            <a href = "">Vivamus sed lectus est, sagittis iaculis. condimentum hendrerit feugiat </a>
            <p>Sed quis ipsum est. Cras dapibus nisi eu arcu adipiscing eget faucibus mauris tempus.</p>
        </div>
    </div>
</div>
2. Paste the following code into layout.css right below the #left-column block.
It should be pretty self-explanatory.
#right-column
{
	float:left;
	width:280px;
	padding:10px;
}
We haven’t styled the event divs yet though, so let’s do that.
Styling the Events
3. Open general.css
4. Paste the following into general.css
/*======================
   EVENTS
========================*/
/*
Each event should have some space below it
*/
.event
{
	float:left;
	margin-bottom:10px;
}
/*
Each event div has a title with a calendar icon.
*/
.event span
{
	background:url(../images/calendar.png) no-repeat;
	display:block;
	padding: 2px 0 2px 20px;
	font-size:10px;
	color:#717171;
}
.event a
{
	display:block;
	margin-bottom:7px;
}
/*
We're going to make the news text smaller and
lighter because we want more emphasis on the title.
*/
.event p
{
	font-size:10px;
	color:#4a4a4a;
}
5. Save and close general.css
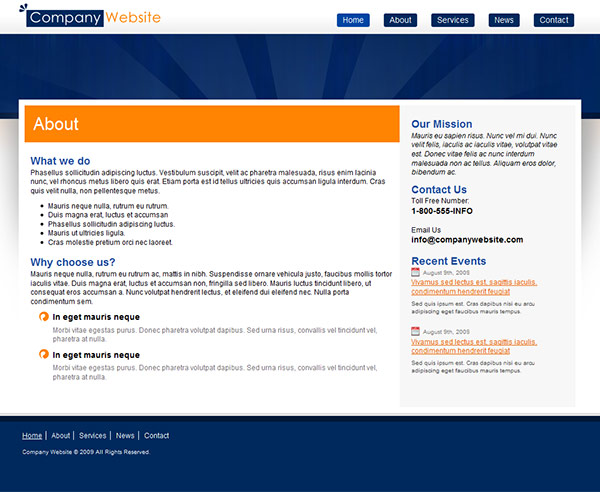
6. It should look like this (click for a larger view).
Did you notice that we didn’t do a lot of styling to create this page? That’s the advantage of creating default styles before we start building the pages. It reduces the work you need to do as you switch back and forth tweaking the styles for each page.
Comments
Post by hajan reckiest on September 1, 2009
very good download
Post by Antwan on September 10, 2009
Hey! Thnx for this tutarial, it helped me to understand the basics of slicing and creating a solid -cross browser- webpage. With my PHP expierences this will help me master all elements to create a dynamicly perfect website! PS1: Are you planning to add a part of navigation user firnedly through the menu? PS2: Seems you forgot somethings (I didn't have all the images in te process) and what exactly is the styles.htm for..?
Post by Joshua Bolduc on October 3, 2009
Styles.htm is the place where you can put all your generic html elements (headings, images, paragraphs etc) that you'll use throughout the rest of the website.
It's a great way to see how all the elements will work together and also ensures that you don't forget anything.
Post by Avijit Dey on October 30, 2009
very good to learn in very short period....
Post by pascal on November 4, 2009
Thanks voor the great tut!
Post by Bob on November 9, 2009
Great tutorial. I particularly like your CSS breakdown/organization methodology. Thanks!
Post by Albin on December 13, 2009
Hai! thanks. I am not able to downloade the psd file you have given. It is downloaded without layer i.e., Composited layer (0ne layer). What should I do?
Post by Joshua Bolduc on December 13, 2009
It sounds like you're opening the file with Adobe Acrobat. Make sure you open it with Photoshop.
Post by Twitz on January 24, 2010
Hmmm. Wouldn't it be easier to just do a File / Export to the CSS and HTML after the slices are all added and let PhotoShop create the files for you? :o)
Post by Joshua Bolduc on January 24, 2010
Hi Twitz, That is an excellent question.
There are a few reasons why you shouldn't export directly from Photoshop.
Photoshop doesn't generate standards based code.
The design won't look the same in all browsers.
Photoshop can't create repeating backgrounds which are crucial in pretty much all designs.
Coding it by hand results in much leaner code that downloads faster.
However, exporting from photoshop could be useful for protyping purposes . . .
Post by eve on February 1, 2010
awesome tutorial.. exactly what I needed! Helped heaps xox
Post by peter on February 10, 2010
when i open the Home.psd file in photoshop cs4 on a mac to begin slicing i see a bunch of blue outlines with numbers in the upper left hand corner. What are these and how do i get rid of them so i can see what i'm slicing (and saving because they show up when i'm trying to save the slices as well. thanks i'm a newbie to this.
Post by Bill Miller on February 12, 2010
Great tutorial. It has helped tremendously.
Post by BerggreenDK on November 25, 2012
Just a few comments. First of all, the favicon.ico ought to be placed in the ROOT of a website, as robots and browsers look for /favicon.ico by default. So those not parsing the HTML for shortcut icons etc. will still find it. Secondly, if you shorten your folder paths to images and css, you will generate shorter HTML which again will let your page load faster. If you only include a few images, this might not seem like a lot, but if you have 10000 visitors the difference between placing everything in /images/ versus /g/ addes 5 bytes ekstra download per image. Lets say you have 30 images on a page, thats 30x5 = 150 ekstra bytes pr. page. Then if you have 10000 visitors it addes up to 1.500.000 bytes or more than a megabyte trafik. Same goes for long css descriptions where you dont need them all as they are nested and therefore can be uniquely identified from a top #id or .class. Eg. if you place the footer menu inside footer, you dont need to specify the class/id in the html as there is only one type of inside the footer and that would be the menu. So instead of spending a lot of bytes on each page, you can spend a little extra bytes on the css (which is downloaded and cached between pages when placed in an external file as you already do) and then shorten the HTML a LOT and it will still make sense afterwards when reading it.